Saturday 29 December 2012
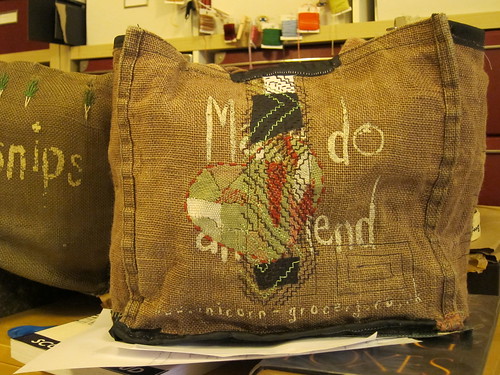
M'dam is ready
Again, I am really happy with this project. It's getting a bit like stone soup, or Granny Weatherwax's broom, and I can predict that I'll be mending this bag again in the future. The poor Parsnips bag is another story. It's wearing out, but the duck tape lining isn't nice to stitch, so I'm not sure if it will be mended or permanently retired.
Saturday 22 December 2012
Getting on with stuff
And here's what the art journal is looking like:
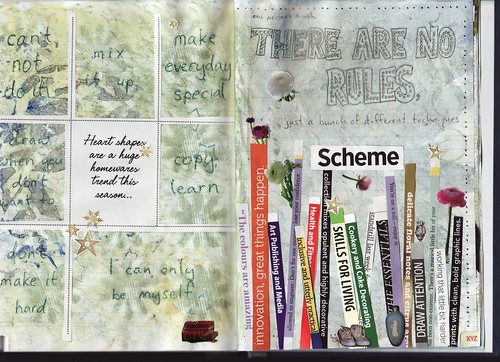
Hopefully you can make out the changes to the background. I used the top of a spray creme canister to press cloth soaked with watercolour, making a soft floral print. It's clearer in this picture. I really like how it turned out, but it makes me even more reluctant to get rid of the random bits of junk I've collected.
My process for these pages is sort of reversed from what I've been doing. It started with finding the advert on the left page. I read a tip in a book on graphic design for dummies that recommended copying layouts that you find appealing. So I flipped through some magazines looking for ideas, and one that stood out was a 3 by 3 grid of pictures on one page with a half page of text on the other. I knew I wanted to stretch myself by working with snippets of text on these pages, so when I saw this advertisement, it gave me the layout as well. I'm only using a few small images, and the next step is to finally add some decorative boarders. I'm enjoying decorating these pages, but I haven't been working on them regularly. Some of that is because I've had a bit of a cold, but I also feel a general lack of motivation. I'm trying not to be too hard on myself about it, and just work when I feel like it would be relaxing.
Saturday 15 December 2012
What I'm doing on the bus
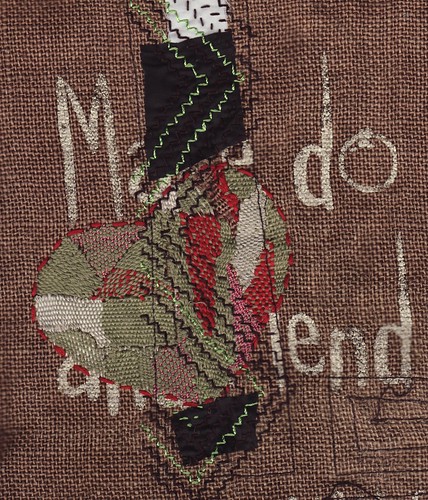
My current bus crafting is... mending the Make Do and Mend bag again! I love this bag, maybe a bit too much. I dream about it; I catch myself singing love songs while stitching it, country and western love songs. When a woman at the pub said how nice it was as she moved it out of the way, my reaction was jealousy. And a bit of concern as there were a few pins holding the patches on. Those patches are now held on by imperfect stitching which I thought was a kantha stitching technique, but I'm failing to find via google. I don't think it's a sashiko stitch, and I'm sure I didn't just make it up. If you recognise what the brown and bright green stitching is called, please leave a comment to let me know what it is called!
Saturday 1 December 2012
Back to the art journal
During my ornament making phase this summer, one of the things I neglected was my art journal. It was back in July when I scanned it at this stage:
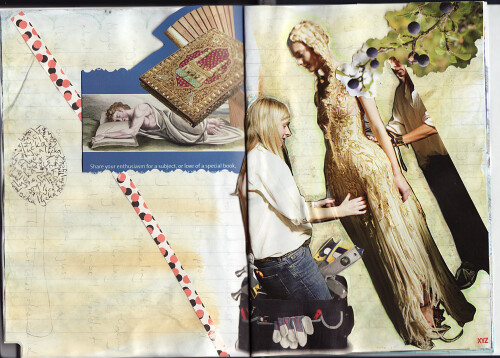
I felt bad about not working in it, like it was doomed to be an unfinished project rather than something I loved working on. But when the faire was over, though it took a while to get back into it, I did start journaling again and now I feel like this spread is finished:
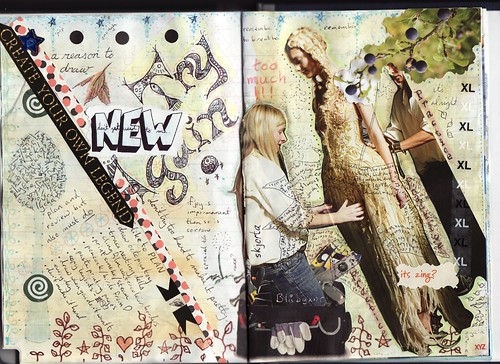
It’s been a bit of a re-learning experience, getting back to it after such a long break. I feel like I had to work slower and think more about how to balance the pages. Possibly because I just love that dress, it was hard to integrate the large picture into the rest of the pages. (Actually, that problem may have contributed to the hiatus in July, but I can’t remember my thinking that clearly). Though I like the books photo which had been in the middle, I was finding it all to much; removing it left a few rough patches on the paper, but nothing I was too bothered by. I’m wondering if I over rely on images and should try to use more snippets of text?
Scanning the pages at several stages helped me figure out what areas needed more attention. The in between shots are now going into a set on Flickr, as part of my moving to another blogging provider. Hopefully this blog will be at a new address in a week or two.
I’m a bit intimidated but also enthused about moving on to these pages:
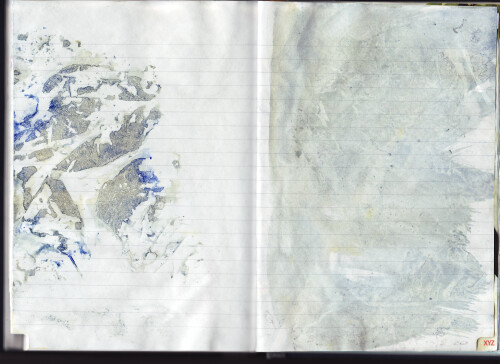
The original watercolouring left a lot of white spaces, which just don’t work for me. I recently picked up a great book on monotypes/monoprints by Julia Ayres, being sold off by Stockport Central Library, only 40p, and I’m curious about applying the techniques in the art journal. I'm also going to look for some interesting text before looking for photos, just to try a slightly different way of working. Hopefully I will update again soon, rather than pausing again.
Saturday 10 November 2012
Too little time and ribbon
The craft fair was a good event from my perspective, and I did actually make a profit of £2, which isn’t bad considering it’s the first time I’ve sold at any sort of craft fair, or any other event for that matter. I need to say a big thanks to Angela, my co-conspirator, who was an immeasurable help to me both on the day and in planning for it.
I’ve been a bit stressed and busy with preparing for the craft fair, so I haven’t been keeping up with other stuff, including this blog. To make up for that, I’m doing a give away!
The mini wreaths (which were relatively popular- one woman bought one to put on the door of her dolls house!) cause me a bit of stress because it took so long to do the ‘berries’ plus I had greatly over estimated how much ribbon I had for the bows. So, now I have about 20 half finished mini wreaths, all at this stage:
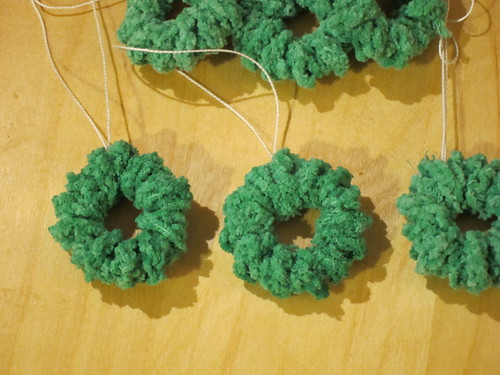
I figure people who read this blog are probably interested in making stuff, so may like to have some of these to finish decorating, either according to my instructions or in any way that appeals! So if you would like to try your hand at decorating a mini wreath (or a half dozen for that matter), leave a comment with your email address so I can get in touch. I won’t publish the email address- the blog is set so I have to approve comments, and I won’t publish any comment with an email address. It’s a first come, first serve offer, so get ‘em while they last!
Also, for those who read my blog, I’m looking into changing to a different blogging service, for purely financial reasons. So sometime soon the blog may be ‘moving house’. Hopefully it won’t be too traumatic.
Thursday 4 October 2012
Review of Voices Plus
I finally went to the Voices Plus show while it’s still at the Waterside Arts Centre, and I highly recommend it to anyone interested in textiles. The show is in Sale until the 13 October 2012, then travelling on, so check the Quilt Art website for more info. (For those unfamiliar with the Manchester area: Sale is a town, so "in Sale" isn't just a quaint way of saying "on Sale"; the prices aren't marked down)
The work is definitely in the art category, meaning they aren’t quilts to wrap up and keep warm with, but I was impressed by the level of quilting and general textile working skill. It is definitely worth checking out for ideas to apply to less arty quilts. I was especially impressed by Mirjam Pet-Jacob’s quilting technique on The Silence In Between:
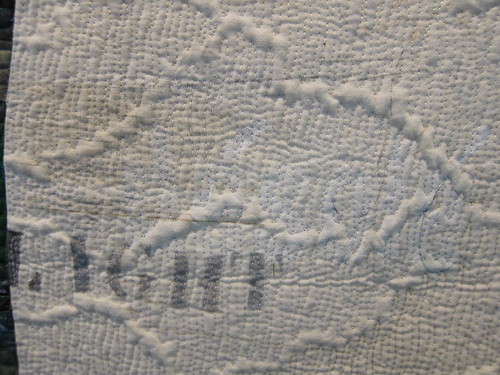
It’s like a topographic map, with the quilted valleys pushing up mountains in the batting. The texture looked so inviting, but I was a good girl and didn't touch it.
It was also nice to see this on the back of Summer 2010 by Dirkje Van Der Horst-Beetsma:
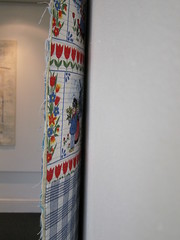
Using fabric like that makes me think these really are quilts, and part of that tradition, as well as fine art. The front of the piece has wonderful gentle colours, the patches and stitches remind me of brush strokes in oil paintings. I've put a little set of photos on my Flickr site, if you want to see more.
It's a delightful exhibit. Even though it is definilty just art quilts, there's loads of different things to see and study. Thank you and well done to all who participated and organized!
Sunday 23 September 2012
Tutorial for making Mini-X-Mas-Wreath Ornaments
Though I'm calling this a tutorial it isn't going to let you make a mini wreath exactly like mine. I use second hand and repurposed materials, so I can't give you a shopping list. Instead I'm sharing how I've made them, and hoping you get enough from it to be able to make your own unique version of the ornaments, using materials and techniques you like.
Please ask question or share your ideas! I'm not experienced at writing tutorials and I'd appreciate feedback.
Materials:
Circle base: Mine are collected from drinks cartons, and are 3 cm in diameter and 0.4 cm wide
String for hanging by
Yarn: See note about this
Crochet hook: Again, read the note on preparing the yarn
Embroidery thread: I'm using 3 strands of red and one of carnation pink
Needle for making french knots
Bulldog clip, or similar, to hold the end of the embroidery thread
Ribbon for bow: Mine is 1.1 cm wide
Sewing thread to match ribbon (this will be visible on the bow)
Sewing needle
Making the wreath base
Preparing the yarn: In my prototype I found that just wrapping the yarn around the ring looked too smooth (see ring on right in the image here), so I tried out crocheting a chain and that was much better. I think the key is a slightly un-even cord texture, so the hills and valleys made by crochet give a more organic look. If crochet just isn't your thing, maybe try braiding, or I think there may be a way to knit a single stitch to make a cord.
The cord is wrapped around a plastic circle base to make the wreath. I'm using the "safety seal" part of the lid of some cartons that stays around the opening when you unscrew the lid:
Cut 24 cm of the string to hang the wreath. Tie it in knot with around a 1cm tail. Loop around the ring, then put the end of the cord through it. Adjust the hanger so when you pull it tight it catches around one of the flanges on the plastic ring, to help hold everything in place:
Hold the hanger string out of the way and wrap the cord around the plastic ring. The wraps don't have to cover the ring completely on the first pass. For the cord and rings I'm using, 3 wraps over each quarter (handily marked by a flange) gives the right density on the first pass.
When you reach the hanger, wrap the cord over the knot ends to hide them. I often end up using the crochet hook to get them tucked in.
Continue past the hanger to do a second pass of wrapping. Again, don't aim for an even coverage, just go over any gaps left by the first pass, and try not to over wrap in any single area.
Your cord may be long enough to reach around exactly twice, but even if it does, this is the point to take a good look at the wreath and see if it looks organic or disfigured, or too tidy. It is easy to unwrap and re-wrap at this stage, so give that a go. If your cord is too long, trim to the length where it finishes the second pass and has only a small tail to tuck in, and make a note now of how much you trimmed off. If your cord is too short, you can either splice more on, or start again with a longer cord. If you splice, tails can be tucked into the inner wraps. Either way, make a note of how much longer your cord needs to be. Finish the wrapping by tucking the end of the cord under one of the first wraps, again a crochet hook helps with this.
Add the berries
So far, this project is fairly easy, but this next bit is genuinely hard. Be prepared to unpick several times, and just be patient with it. Thread you embroidery needle. Instead of knotting the thread, clip the bulldog clip about 4 to 5 cm from the end. A knot would just pull through the crochet, but the clip will hold the thread in place while you get the stitching started.
The wreath doesn't have a front/back at this point, so berries will be added to both sides, but for clarity I'll call the side the bulldog clip will be on the back. Pull the needle from the back of the wreath to the front through the cord. You will probably feel if the stitch is on the inside or outside of the ring. It doesn't matter either way, but I feel the whole thing is more secure if the following stitch is on the other side of the ring.
Do the thread wraps for the French knot; place the needle for the stitch so that it will come out the other side of the wreath a bit further along from the starting point, but don't press it through. Gently tighten the knot around the needle, snugly against the wreath, then hold the knot in place between the fingers of one hand while pulling the needle through with the other. It is very easy to pull too tightly and end up with the knot in the middle of the cord, or as a big mess on the other side of the wreath. Just unpick any mistakes and try the knot again.
Once you've made the first knot, take a look and decide if you want to use more/fewer strands, or maybe more/fewer wraps in your French knots. Also, consider if you want to try something else. A friend at the embroiderers guild thought I was daft, if not mad, to use French knots instead of beads. She did understand when I explained that my beads were to shiny to go with the soft colour of the yarn, but I had to agree that beads would be much easier. If you get no joy from stitching French knots, my advice is to just not do them. Instead, brainstorm for a few minutes, thinking of any crazy (or sensible) way to decorate your wreath, then assess each idea, and you'll probably come up with something cute and fun.
Assuming you are happy with the stitch, turn the wreath over and do the same knot on that side, again sticking the needle through to move around the wreath. When you complete the circuit, place the last stitch so the thread comes up at the original entry point (oh, and you can remove that bulldog clip, if you haven't already after having it snarl your thread several times). This bit is probably not strictly necessary, but I like knowing what my ends are doing, so thread the ends of the thread into the needle alongside the, um, other ends that are already there. Make a final knot, then trim all the ends off where they are pulled through the other side.
The bow
Thread your sewing needle but leave it unknotted. Cut 10 cm of ribbon, angling the ends in the same direction. Fold the ribbon in the center at an angle, so the two arms go up at the angle the loops of the bow will have.
Fold each arm back down forming the loops and ends.
Stitch the ribbon through the original fold and crossed arms. Gather the thread and tie it.
Then wrap the thread around the gathers to form the knot of the bow.
Tie the thread but don't trim it. Place the bow on the wreath and use the same thread to tack it on, sewing around the ring twice, then tie it again and tuck and trim the thread.
There you go! I hope you find this tutorial helpful/inspiring/amusing. If you do have a go at making one of these wreath ornaments, I'd really like to know how it turns out.
Thursday 20 September 2012
not the tutorial
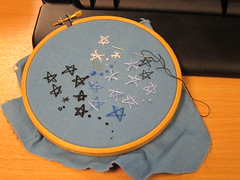
Honest, I am working on the tutorial, but in the mean time I thought I should post about what I'm doing on the bus:
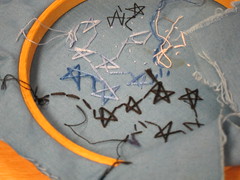
It's just a practice sample, trying to make a stitch to use on the quilt that I am still working on, even if it is in fits and starts. I wanted something that would look good on the reverse as well as the front, and I think with a bit more practice, using a series of 10 straight stitches to make a 5 pointed star will be very effective. I've been practicing off and on for a week, and I am getting better.
Sunday 16 September 2012
Crafting for the fair
I know, it's been a while since my last update, but I've just not had the mental energy to pull together a post. But Victoria Baths have sent out the flyers for their craft fair, and they are so cute I just have to share them:
Their iconic stained glass fairy has gone all crafty for the occasion, and I just love how the yarn on the back of the flyer meets up with the strand on the front. A little detail that shows the care and attention they put into their work.
The open day is £2.50 (£3.00 Gift Aid) for adults, or free for the under 16s or Friends of Victoria Baths. You'll be able to wander around the building or take a guided tour (the one we took was full of fascinating social history). Bring your camera and/or sketchbook, because the building is very photogenic, even though (or perhaps because) it isn't completely restored yet.
As for me, I'm focussing my care and attention on making the ornaments I'll be selling at the fair. My craft table has been like this for a month:
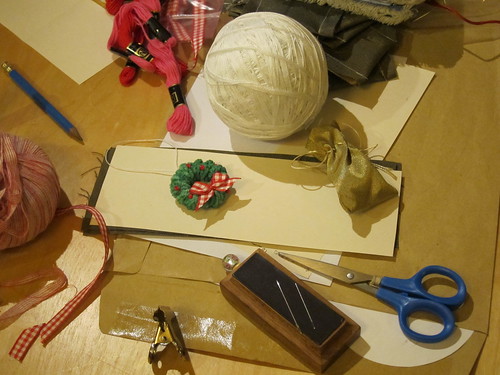
It's a challenge for me to repeat the same process again and again, but the mini-wreaths especially are making me think "cute!" every time I finish one. I know I've promised tutorials before and not delivered, but I'm almost done with writing out the instructions for these and I hope to get some photos this week. I'll set myself a mini-challenge to get a tutorial posted by end of next weekend, so any readers who share my enthusiasm for the mini-wreaths can have a go at making their own (as I know you can't all come to the craft fair on November 4th, though of course you do want to).
Thursday 19 July 2012
Quilt update slowdown
The quilting project has reached the next bus crafting phase. It is a bit of an odd, maybe crazy, way to do things, but I'm knitting the batting for the quilt. How can this make sense? My reasoning goes along these lines:
- The quilt is a stash busting project.
- The quilt should be warm, therefore it needs a filling.
- I don't have any batting in my stash, and I don't want to buy any to add to my stash.
- There is lots of yarn in my stash, including some bright synthetic stuff. (My mom is sweet and generous, but our tastes don't always coincide.)
- So using the yarn just for its warmth, not its colour, makes perfect sense.
It will make for a much longer project. There's 10 cm on the needles at the moment, so I suspect it will keep me busy for a while yet. This means I'll rearrange my crafting time at home to focus on making stuff for the craft fair at Victoria Baths. I've never sold stuff before, so it feels like a very big challenge! I will make an effort to not run away and hide.
Sunday 8 July 2012
Under the influence
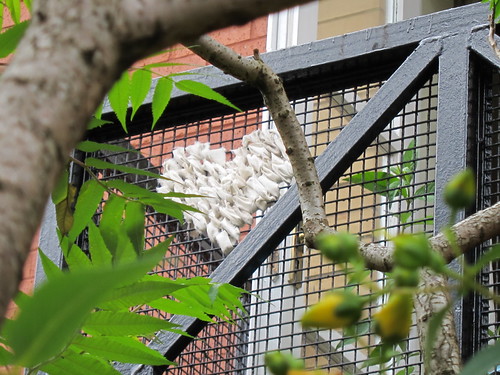
It was inevitable really, what with seeing so many fabric/fencing combinations, that I would give it a go. This is my newly embroidered balcony:
The fabric is some old medium weight cotton ripped into roughly 2 inch strips (I've been going through my stash to make quilt patches, just like I planned, so imagine me looking smug as I write this). I thought it would be just like cross stitch, but when I tried that it just looked like the wires were wrapped with fabric. Not necessarily bad, but a bit too subtle for what I had in mind. This 'stitch' goes across and over a gap, putting a longer section of the strip as the visible part of the stitch. I'm happy enough with it that I'm planning to do another on the other side of the balcony. The pattern is a bit twee, a bit cheesy, but that's just how I am.
I wonder how it will stand up to the rain?
Saturday 7 July 2012
Things and thinking
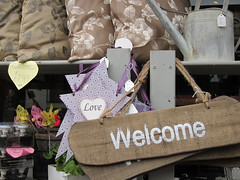
There's a nice-stuff-for-the-home shop on Prince's Street (that's in Stockport, in England, for readers not used to my usual geographic references). I can't remember what it's called, but I always glance at its display as I walk by. I do just walk by, as I know my home making skills don't extend to displays of nice stuff. Maybe that's why the similarity between the shop display and my art journal struck me. The signs and nice objects seem similar to the pretty pictures and words that I stick in the journal. Am I trying to make the journal into a nice home? Somewhere safe and relaxing? Just thinking.
I've had some trouble working on these pages. I really like the elements, but just can't seem to get them to work together. But it's reached the point where I can't see any way to improve it, and besides, I'm eager to start on this next set of pages.
I like the yellow and already have some pictures in mind. I nicked an old magazine from the office break room. I'm not sure about the etiquette of taking a magazine someone else has left for the office, but it is over a year old, so everyone has had time to peruse it. I also like the XYZ printed on the page and I'd like to do something with that. And I like how bits of the previous page have leaked onto these pages. When I was a kid I disliked how marker pens forced you to chose only one side of a page in a colouring book. Now I see things differently.
And on a quilt in progress note, I'm working on piecing the top together this weekend!
Saturday 30 June 2012
Let me explain
I've sort of fallen off the internet for a while. The main reason is that I was trying to be too fancy with writing up a good blog post, so I didn't do anything at all. Remember a previous post's complaint about the problems with a stamp I made? Well, though that use didn't work out, I still think it is an interesting way of making a mark, and I wanted to give a better impression of the technique. So I decided to do a proper tutorial post, letting people know how to do it and what the finished result ought to look like. But that would mean writing proper instructions and taking proper photos (maybe when my nails weren't stained green from dying yarn), and using the stamps to decorate something, proper like.
That just didn't happen, possibly because I was properly intimidated. However, because I wanted to write the tutorial, I didn't write any other posts. And because I wanted to use the stamp, I sort of stopped doing other stuff in the art journal. This morning, I decided to just skip the tutorial and get on with doing stuff again. The tutorial may happen someday, but for now I'll just show the art journal pages with a better use of the fabric-plus-plastic-confetti stamp, making the red hearts in the upper corners:
I'm sort of tired of these pages, but they don't feel full enough, so I'm going to spend a bit more time on them. And hopefully just get back into the habit of doing stuff in the art journal just because it's fun.
On the bus, I have finished taking apart the cushion covers and started reading Ways of Seeing.
Sunday 10 June 2012
not so exciting update
I suppose it is fitting in a way, as the second pages at the start of this art journal are sort of boring, that the second pages at this other start are looking a bit boring as well:
I don't get what's wrong. There's exciting stuff: ships, woman with sea shell, clock face jellyfish. But somehow I've put them together in a very boring way. Hmm. Maybe there isn't enough interaction between the different elements. I don't really know what I'm doing, so I'll just keep working on it.
Making a habit of working in the art journal after my daily Wii-Fitting seems to be working fairly well. In fact, I've been thinking about trying to attach a drawing habit to the art journalling. I routinely whine like an adolescent about how I want to draw, but I've never stuck to a plan for improving my drawing skills. I'm not sure how I would combine drawing practice with the art journalling though. Hmm, again.
In quilt related news, I'm still working on unpicking the third pillowcase. I did a bit more while waiting for the Manchester Day Parade, so I feel like I'm still making progress with it.
Saturday 9 June 2012
fabric street art
According to yarnbombing.com, today is International Yarn Bombing Day 2012, and on my way home from the fabric shop I spotted this: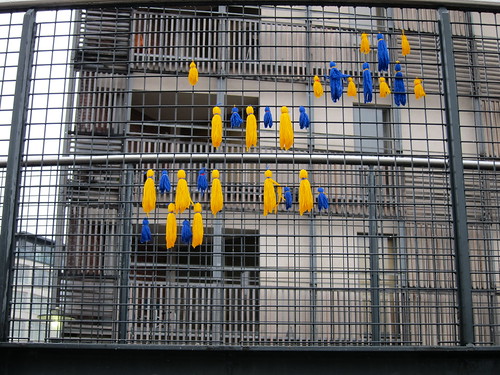
Is decorating fencing with textiles a new street art trend? I ask because I've recently seen this: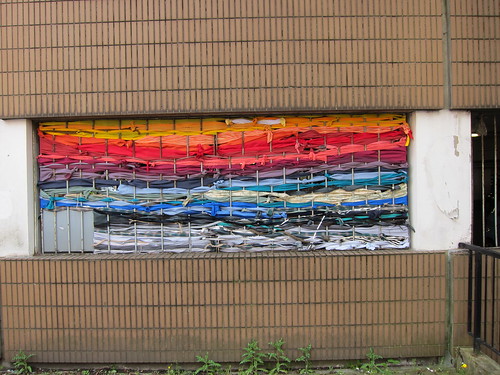
And this: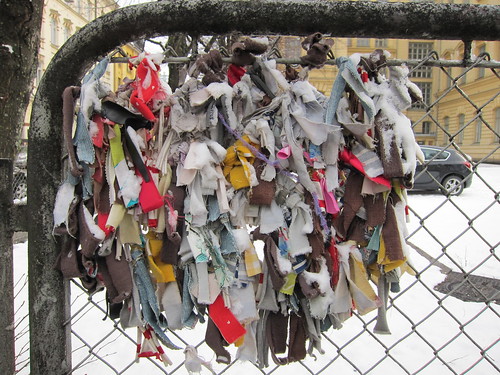 Yes, that is a recent photo, despite the snow. It's from April but in Helsinki, not Manchester.
I don't follow the street art scene, so I'm not sure if this is up-and-coming or ancient history, but it got my attention.
Sunday 3 June 2012
stopping before it's too late
I've decided that this spread is done, because I'm worried that any more work on it would move it from the 'mess' to 'total mess' category:
Looking at it again, it's not bad, and I do still like it, but the additional background colour didn't really work out. I found a plastic dove shape from some wedding confetti and tried using it as a stamped image. What you do is put the plastic shape on a smooth bit of wood, then wrap cloth around it and use it like a rubber stamp. I've done this before and it's worked well, but it was a bit messy this time, probably because I was a bit tired and not concentrating well. Then I tried painting over the stamping, which made things even messier. So, time to move on to this:
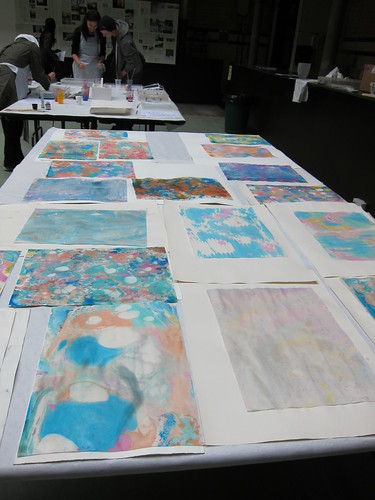
I'm actually looking forward to starting on a fresh set of pages, trying out new ideas and using up some of the stuff I've collected. My problem with adding to the stash has been especially bad this weekend. I picked up a bagful of fabric and yarn at the guild meeting yesterday, then made some lovely marbled paper at a workshop at Victoria Baths today:
Only one of those is mine, but I made 2 more before heading home. Marbling paper is fun, but what am I going to to with it? I have trouble finding space to work in, and stuff just gets lost in piles in my craft area. But I can't bear to get rid of stuff, and I can't resist getting more. Yes, I have a continuing problem.
Note: the workshop was run by Sue Shaw, who can be contacted at Hot Bed Press.
Sunday 27 May 2012
a good day
I've had a good day. The laundry basket has only one item in it; made a very tasty loaf of sour dough bread in the steamer; and finally got around to doing this:
Something I'm finding interesting about blogging this art journal project is that scanning and displaying the images makes me see the work differently. In the last scan, I didn't like how the dotted horizontal line just stopped, and so as you can see above I continued it across the other page. Not a big thing, but it makes me like it more.
I've still not made a habit of working on the journal, but I read a bit of the site mentioned in the annakatta blog. It was a bit too happy-clappy for me, but evidently one of the tricks to forming habits is to attach them to habits you already have. Surprisingly, I do have an almost daily habit of doing 30 mins of WiiFit (no, I really don't know how I have kept that up), and so the new plan is to get the art journal out after that. It worked this evening.
Also, I finished un-picking one of the pillow cases this weekend, and the next one is in my bag, ready for tomorrow's commute.
Wednesday 23 May 2012
Embroidery done
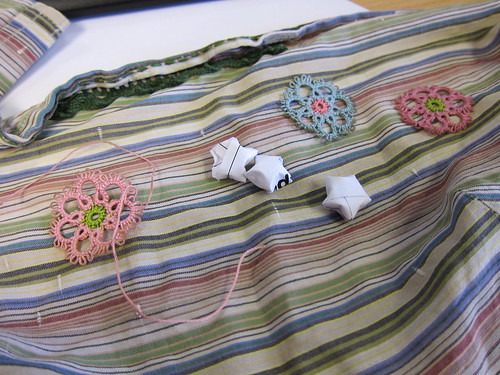
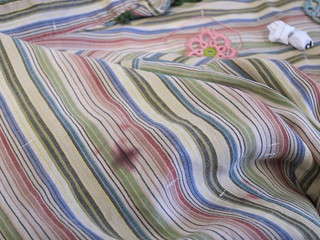
While ironing the shirt, I found 2 more stains to cover over, and I did end up adding a bit more embroidery to the front of the shirt as well, but now it's finished (and in the laundry pile):
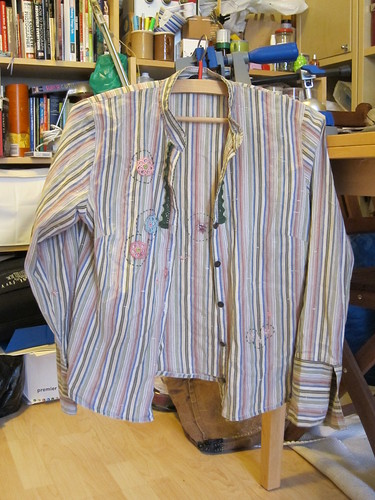
I opted not to put on the extra tatting, mainly because it would need to be tea dyed and I just didn't want to wait for it to dry. I've put it away for later, along with the extra dyed threads from this project, neatly tucked into a labeled ziplock bag, and shoved into my ribbons box. It kind of makes sense to store them there, as it's where I'd keep lace or fancy strings; at least it makes more sense than storing them in my needle bag.
My new bus craft is sort of boring, but it's just one part of a big, exciting project! I've gone off having decorative pillows on the sofa, but we have some nice pillowcases made from what I think is handwoven fabric in some sort of South American design, very bright and colourful. For years, I've been meaning to try making a quilt from them, to use as a throw on the sofa, which is totally different from having pillows on the sofa, honest. Planning the layout of the pieces was always too difficult, but on the weekend I came up with this:
My P said the diagram looks like something from the Voynich Manuscript. Still, it feels like enough of a plan to get started on, so I'm un-picking the pillow case seams on the bus. Yes, that's as exciting as it sounds. Hopefully when I've finished that step, I'll have collected together the other fabrics to piece with the pillowcases, and the project won't come to a sudden halt like so many of my endeavors do. I'm trying to keep track of the time I'm spending on this project, mostly as a way of keeping the project on track. And of course, having the blog should help with tracking the project, too. (I feel like I've not been using this blog very well, but that's a big, exciting project for another day.)
Saturday 19 May 2012
An update
At last! An update on the art journal:

There's no photo, but trust me, I've also been working on the shirt. I think all the stains are embroidered over, but now I'm wondering if I should continue to use up the rest of the thread; and while going through my craft supplies yesterday I came across some more tatting (what was past me thinking, putting it in with my needles?), so I'm wondering if I should add those as well. My next step is to iron the shirt and see how it looks when I'm wearing it.
Going through my craft supplies has left me feeling a bit overwhelmed. There's so many things I want to try, but I know I don't have a good record on finishing projects.
Saturday 12 May 2012
Tea dye
I've been especially lazy on the bus this week and not much livelier at home, so no progress to report this week. Instead here is a rather low quality photo of the tea dyed string and the un-dyed versions of the thread.
The tea dyed sections (the vertically wound bits) were left in a mug of tea with a bit of soymilk for a day, then taken out to dry without rinsing. Even in this poor photo, I think you can make out how the pink is tinged brown while the darker green is mostly the same colour but without the slight glossiness. The pale green is also tea dyed, but I couldn't remember which lot of embroidery thread I snipped it from, so there's no "before" to compare it to.
The tea dye seems to just sort of dull the colours a bit, and that makes the string work better with the shirt fabric. Or, it would work better with the fabric, if I ever get around to embroidering with it. Maybe next week.
Monday 7 May 2012
Not the end of the art journal
I am a bit of a worrier, and one of the many down sides of that is the worries become excuses not to do stuff. This is an example of how silly I get: after only 7 spreads, I was worrying about how the art journal would end, would it just finish or would I have to figure out a good ending? would it be consistent with the start? oh, dear, oh dear. (My thought processes aren't always grammatically correct.) I was reluctant to use up images too soon, reluctant to start a new page without knowing where I was going with the entire project.
This worry has now been completely overcome by doing this:
After seeing lots of Japanese books/manga/magazines, it occurred to me that I was thinking about the art journal in a very limited, linear way. Instead of worrying how it will end, I've made a second beginning, at what I usually think of as the back of the book. So, there's now two beginnings that will meet somewhere in the middle. It's turning out to be a challenge to think of the pages running right to left, which is probably good exercise for the brain.
Also, sort of fitting for a new beginning, I'm changing my work habits. On the bus, I'm going to focus on mending and embroidery for a while, as I had been missing the needlework, but to keep the art journal project going, I'm aiming to work on it 30 minutes every(ish) evening. Let's see how it goes.
Thursday 3 May 2012
Spotted
This morning, a girl sat down next to me on the bus, took out a handful of 1 cm paper strips and proceeded to make the cutest little paper stars! I was too shy to ask her about them, but as she made at least a half dozen before getting off to go to school, I had plenty of time to learn through observation. On my lunch break, I made a few from scrap paper, and though mine aren't as neat and tidy as hers, I think they are pretty cute! It's also one of those things I want to try in differnt papers, foils, fabrics, etc. Endless possibilities! I feel bad that I didn't thank the girl and share my enthusiasm for her craftiness, but on the plus side, I didn't freak her out either. (As an aside, why does my autocomplete suggest 'firearms' instead of 'cuteness'?)
Oh, and the art journal is not forgotten! I'll try to update my progress this weekend.
Wednesday 28 March 2012
taking a break
I had been meaning to take a break from crafting and blogging while on vacation in April, but I seem to have started the break a bit early. Some of that is the stress and excitement of planning a big holiday, and some of it is the stress of training up a new colleague at work; but most of the reason I haven't felt up to doing much is the shock of finding out an old friend of ours has cancer. It's just been diagnosed and obviously we're hoping for the best. It really puts things into perspective.
Anyway, the journal is waiting for me, and I may get back to it before the holiday, or I may not. This is how it's looking:
