Though I'm calling this a tutorial it isn't going to let you make a mini wreath exactly like mine. I use second hand and repurposed materials, so I can't give you a shopping list. Instead I'm sharing how I've made them, and hoping you get enough from it to be able to make your own unique version of the ornaments, using materials and techniques you like.

Please ask question or share your ideas! I'm not experienced at writing tutorials and I'd appreciate feedback.
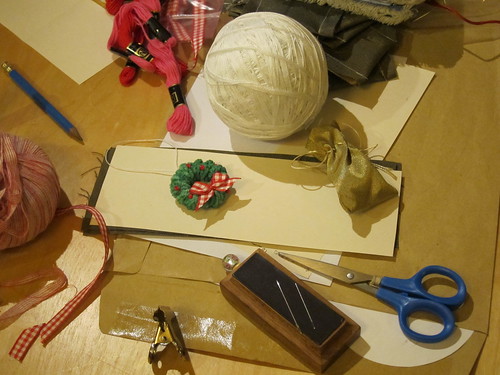
Materials:

Circle base: Mine are collected from drinks cartons, and are 3 cm in diameter and 0.4 cm wide
String for hanging by
Yarn: See note about this
Crochet hook: Again, read the note on preparing the yarn
Embroidery thread: I'm using 3 strands of red and one of carnation pink
Needle for making french knots
Bulldog clip, or similar, to hold the end of the embroidery thread
Ribbon for bow: Mine is 1.1 cm wide
Sewing thread to match ribbon (this will be visible on the bow)
Sewing needle
Making the wreath base
Preparing the yarn: In my prototype I found that just wrapping the yarn around the ring looked too smooth (see ring on right in the image here), so I tried out crocheting a chain and that was much better. I think the key is a slightly un-even cord texture, so the hills and valleys made by crochet give a more organic look. If crochet just isn't your thing, maybe try braiding, or I think there may be a way to knit a single stitch to make a cord.

The cord is wrapped around a plastic circle base to make the wreath. I'm using the "safety seal" part of the lid of some cartons that stays around the opening when you unscrew the lid:

Cut 24 cm of the string to hang the wreath. Tie it in knot with around a 1cm tail. Loop around the ring, then put the end of the cord through it. Adjust the hanger so when you pull it tight it catches around one of the flanges on the plastic ring, to help hold everything in place:

Hold the hanger string out of the way and wrap the cord around the plastic ring. The wraps don't have to cover the ring completely on the first pass. For the cord and rings I'm using, 3 wraps over each quarter (handily marked by a flange) gives the right density on the first pass.

When you reach the hanger, wrap the cord over the knot ends to hide them. I often end up using the crochet hook to get them tucked in.

Continue past the hanger to do a second pass of wrapping. Again, don't aim for an even coverage, just go over any gaps left by the first pass, and try not to over wrap in any single area.

Your cord may be long enough to reach around exactly twice, but even if it does, this is the point to take a good look at the wreath and see if it looks organic or disfigured, or too tidy. It is easy to unwrap and re-wrap at this stage, so give that a go. If your cord is too long, trim to the length where it finishes the second pass and has only a small tail to tuck in, and make a note now of how much you trimmed off. If your cord is too short, you can either splice more on, or start again with a longer cord. If you splice, tails can be tucked into the inner wraps. Either way, make a note of how much longer your cord needs to be. Finish the wrapping by tucking the end of the cord under one of the first wraps, again a crochet hook helps with this.
Add the berries
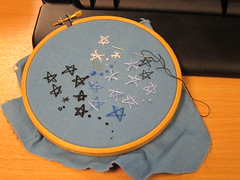
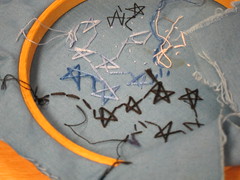
So far, this project is fairly easy, but this next bit is genuinely hard. Be prepared to unpick several times, and just be patient with it. Thread you embroidery needle. Instead of knotting the thread, clip the bulldog clip about 4 to 5 cm from the end. A knot would just pull through the crochet, but the clip will hold the thread in place while you get the stitching started.
The wreath doesn't have a front/back at this point, so berries will be added to both sides, but for clarity I'll call the side the bulldog clip will be on the back. Pull the needle from the back of the wreath to the front through the cord. You will probably feel if the stitch is on the inside or outside of the ring. It doesn't matter either way, but I feel the whole thing is more secure if the following stitch is on the other side of the ring.

Do the thread wraps for the French knot; place the needle for the stitch so that it will come out the other side of the wreath a bit further along from the starting point, but don't press it through. Gently tighten the knot around the needle, snugly against the wreath, then hold the knot in place between the fingers of one hand while pulling the needle through with the other. It is very easy to pull too tightly and end up with the knot in the middle of the cord, or as a big mess on the other side of the wreath. Just unpick any mistakes and try the knot again.

Once you've made the first knot, take a look and decide if you want to use more/fewer strands, or maybe more/fewer wraps in your French knots. Also, consider if you want to try something else. A friend at the embroiderers guild thought I was daft, if not mad, to use French knots instead of beads. She did understand when I explained that my beads were to shiny to go with the soft colour of the yarn, but I had to agree that beads would be much easier. If you get no joy from stitching French knots, my advice is to just not do them. Instead, brainstorm for a few minutes, thinking of any crazy (or sensible) way to decorate your wreath, then assess each idea, and you'll probably come up with something cute and fun.
Assuming you are happy with the stitch, turn the wreath over and do the same knot on that side, again sticking the needle through to move around the wreath. When you complete the circuit, place the last stitch so the thread comes up at the original entry point (oh, and you can remove that bulldog clip, if you haven't already after having it snarl your thread several times). This bit is probably not strictly necessary, but I like knowing what my ends are doing, so thread the ends of the thread into the needle alongside the, um, other ends that are already there. Make a final knot, then trim all the ends off where they are pulled through the other side.

The bow
Thread your sewing needle but leave it unknotted. Cut 10 cm of ribbon, angling the ends in the same direction. Fold the ribbon in the center at an angle, so the two arms go up at the angle the loops of the bow will have.

Fold each arm back down forming the loops and ends.

Stitch the ribbon through the original fold and crossed arms. Gather the thread and tie it.

Then wrap the thread around the gathers to form the knot of the bow.

Tie the thread but don't trim it. Place the bow on the wreath and use the same thread to tack it on, sewing around the ring twice, then tie it again and tuck and trim the thread.

There you go! I hope you find this tutorial helpful/inspiring/amusing. If you do have a go at making one of these wreath ornaments, I'd really like to know how it turns out.