Saturday, 29 December 2012
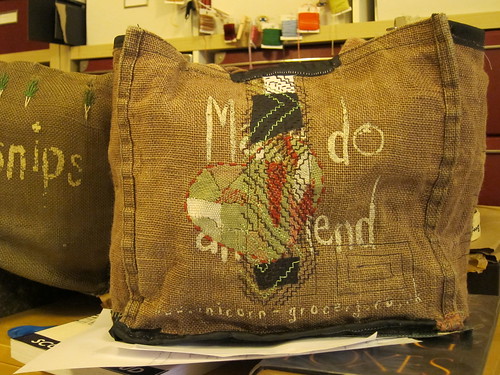
M'dam is ready
Again, I am really happy with this project. It's getting a bit like stone soup, or Granny Weatherwax's broom, and I can predict that I'll be mending this bag again in the future. The poor Parsnips bag is another story. It's wearing out, but the duck tape lining isn't nice to stitch, so I'm not sure if it will be mended or permanently retired.
Saturday, 22 December 2012
Getting on with stuff
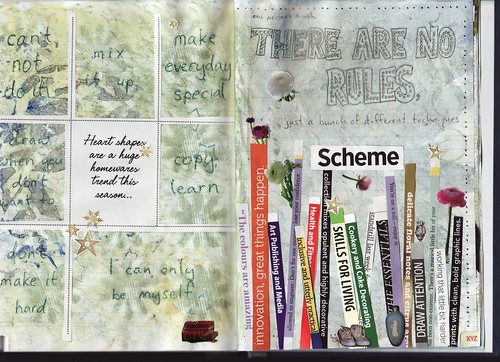
And here's what the art journal is looking like:

Hopefully you can make out the changes to the background. I used the top of a spray creme canister to press cloth soaked with watercolour, making a soft floral print. It's clearer in this picture. I really like how it turned out, but it makes me even more reluctant to get rid of the random bits of junk I've collected.
My process for these pages is sort of reversed from what I've been doing. It started with finding the advert on the left page. I read a tip in a book on graphic design for dummies that recommended copying layouts that you find appealing. So I flipped through some magazines looking for ideas, and one that stood out was a 3 by 3 grid of pictures on one page with a half page of text on the other. I knew I wanted to stretch myself by working with snippets of text on these pages, so when I saw this advertisement, it gave me the layout as well. I'm only using a few small images, and the next step is to finally add some decorative boarders. I'm enjoying decorating these pages, but I haven't been working on them regularly. Some of that is because I've had a bit of a cold, but I also feel a general lack of motivation. I'm trying not to be too hard on myself about it, and just work when I feel like it would be relaxing.
Saturday, 15 December 2012
What I'm doing on the bus
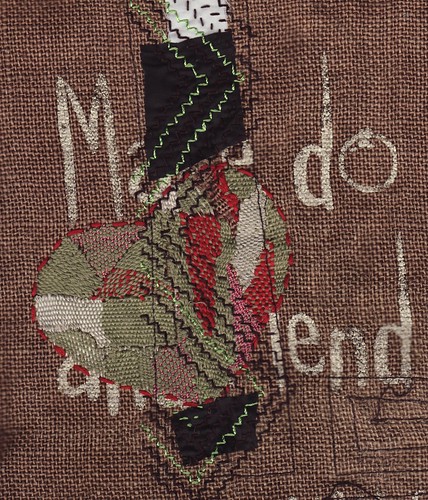
My current bus crafting is... mending the Make Do and Mend bag again! I love this bag, maybe a bit too much. I dream about it; I catch myself singing love songs while stitching it, country and western love songs. When a woman at the pub said how nice it was as she moved it out of the way, my reaction was jealousy. And a bit of concern as there were a few pins holding the patches on. Those patches are now held on by imperfect stitching which I thought was a kantha stitching technique, but I'm failing to find via google. I don't think it's a sashiko stitch, and I'm sure I didn't just make it up. If you recognise what the brown and bright green stitching is called, please leave a comment to let me know what it is called!
Saturday, 1 December 2012
Back to the art journal
During my ornament making phase this summer, one of the things I neglected was my art journal. It was back in July when I scanned it at this stage:

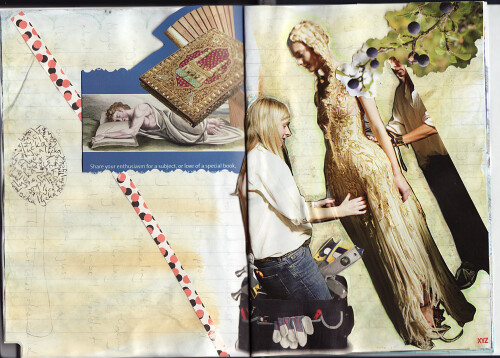
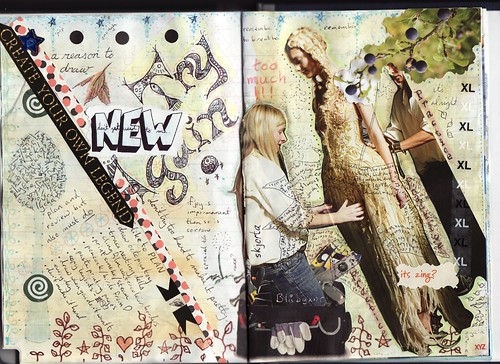
I felt bad about not working in it, like it was doomed to be an unfinished project rather than something I loved working on. But when the faire was over, though it took a while to get back into it, I did start journaling again and now I feel like this spread is finished:

It’s been a bit of a re-learning experience, getting back to it after such a long break. I feel like I had to work slower and think more about how to balance the pages. Possibly because I just love that dress, it was hard to integrate the large picture into the rest of the pages. (Actually, that problem may have contributed to the hiatus in July, but I can’t remember my thinking that clearly). Though I like the books photo which had been in the middle, I was finding it all to much; removing it left a few rough patches on the paper, but nothing I was too bothered by. I’m wondering if I over rely on images and should try to use more snippets of text?
Scanning the pages at several stages helped me figure out what areas needed more attention. The in between shots are now going into a set on Flickr, as part of my moving to another blogging provider. Hopefully this blog will be at a new address in a week or two.
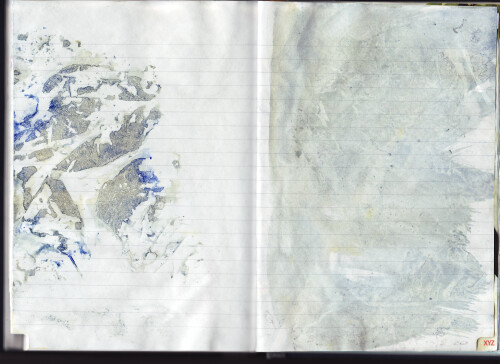
I’m a bit intimidated but also enthused about moving on to these pages:

The original watercolouring left a lot of white spaces, which just don’t work for me. I recently picked up a great book on monotypes/monoprints by Julia Ayres, being sold off by Stockport Central Library, only 40p, and I’m curious about applying the techniques in the art journal. I'm also going to look for some interesting text before looking for photos, just to try a slightly different way of working. Hopefully I will update again soon, rather than pausing again.
Saturday, 10 November 2012
Too little time and ribbon
The craft fair was a good event from my perspective, and I did actually make a profit of £2, which isn’t bad considering it’s the first time I’ve sold at any sort of craft fair, or any other event for that matter. I need to say a big thanks to Angela, my co-conspirator, who was an immeasurable help to me both on the day and in planning for it.
I’ve been a bit stressed and busy with preparing for the craft fair, so I haven’t been keeping up with other stuff, including this blog. To make up for that, I’m doing a give away!
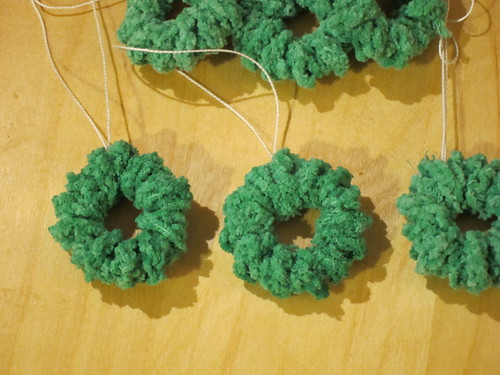
The mini wreaths (which were relatively popular- one woman bought one to put on the door of her dolls house!) cause me a bit of stress because it took so long to do the ‘berries’ plus I had greatly over estimated how much ribbon I had for the bows. So, now I have about 20 half finished mini wreaths, all at this stage:

I figure people who read this blog are probably interested in making stuff, so may like to have some of these to finish decorating, either according to my instructions or in any way that appeals! So if you would like to try your hand at decorating a mini wreath (or a half dozen for that matter), leave a comment with your email address so I can get in touch. I won’t publish the email address- the blog is set so I have to approve comments, and I won’t publish any comment with an email address. It’s a first come, first serve offer, so get ‘em while they last!
Also, for those who read my blog, I’m looking into changing to a different blogging service, for purely financial reasons. So sometime soon the blog may be ‘moving house’. Hopefully it won’t be too traumatic.
Thursday, 4 October 2012
Review of Voices Plus
I finally went to the Voices Plus show while it’s still at the Waterside Arts Centre, and I highly recommend it to anyone interested in textiles. The show is in Sale until the 13 October 2012, then travelling on, so check the Quilt Art website for more info. (For those unfamiliar with the Manchester area: Sale is a town, so "in Sale" isn't just a quaint way of saying "on Sale"; the prices aren't marked down)
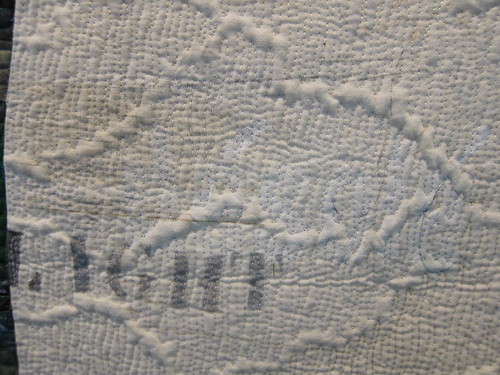
The work is definitely in the art category, meaning they aren’t quilts to wrap up and keep warm with, but I was impressed by the level of quilting and general textile working skill. It is definitely worth checking out for ideas to apply to less arty quilts. I was especially impressed by Mirjam Pet-Jacob’s quilting technique on The Silence In Between:

It’s like a topographic map, with the quilted valleys pushing up mountains in the batting. The texture looked so inviting, but I was a good girl and didn't touch it.
It was also nice to see this on the back of Summer 2010 by Dirkje Van Der Horst-Beetsma:

Using fabric like that makes me think these really are quilts, and part of that tradition, as well as fine art. The front of the piece has wonderful gentle colours, the patches and stitches remind me of brush strokes in oil paintings. I've put a little set of photos on my Flickr site, if you want to see more.
It's a delightful exhibit. Even though it is definilty just art quilts, there's loads of different things to see and study. Thank you and well done to all who participated and organized!
Sunday, 23 September 2012
Tutorial for making Mini-X-Mas-Wreath Ornaments
Though I'm calling this a tutorial it isn't going to let you make a mini wreath exactly like mine. I use second hand and repurposed materials, so I can't give you a shopping list. Instead I'm sharing how I've made them, and hoping you get enough from it to be able to make your own unique version of the ornaments, using materials and techniques you like.
Please ask question or share your ideas! I'm not experienced at writing tutorials and I'd appreciate feedback.
Materials:
Circle base: Mine are collected from drinks cartons, and are 3 cm in diameter and 0.4 cm wide
String for hanging by
Yarn: See note about this
Crochet hook: Again, read the note on preparing the yarn
Embroidery thread: I'm using 3 strands of red and one of carnation pink
Needle for making french knots
Bulldog clip, or similar, to hold the end of the embroidery thread
Ribbon for bow: Mine is 1.1 cm wide
Sewing thread to match ribbon (this will be visible on the bow)
Sewing needle
Making the wreath base
Preparing the yarn: In my prototype I found that just wrapping the yarn around the ring looked too smooth (see ring on right in the image here), so I tried out crocheting a chain and that was much better. I think the key is a slightly un-even cord texture, so the hills and valleys made by crochet give a more organic look. If crochet just isn't your thing, maybe try braiding, or I think there may be a way to knit a single stitch to make a cord.
The cord is wrapped around a plastic circle base to make the wreath. I'm using the "safety seal" part of the lid of some cartons that stays around the opening when you unscrew the lid:
Cut 24 cm of the string to hang the wreath. Tie it in knot with around a 1cm tail. Loop around the ring, then put the end of the cord through it. Adjust the hanger so when you pull it tight it catches around one of the flanges on the plastic ring, to help hold everything in place:
Hold the hanger string out of the way and wrap the cord around the plastic ring. The wraps don't have to cover the ring completely on the first pass. For the cord and rings I'm using, 3 wraps over each quarter (handily marked by a flange) gives the right density on the first pass.
When you reach the hanger, wrap the cord over the knot ends to hide them. I often end up using the crochet hook to get them tucked in.
Continue past the hanger to do a second pass of wrapping. Again, don't aim for an even coverage, just go over any gaps left by the first pass, and try not to over wrap in any single area.
Your cord may be long enough to reach around exactly twice, but even if it does, this is the point to take a good look at the wreath and see if it looks organic or disfigured, or too tidy. It is easy to unwrap and re-wrap at this stage, so give that a go. If your cord is too long, trim to the length where it finishes the second pass and has only a small tail to tuck in, and make a note now of how much you trimmed off. If your cord is too short, you can either splice more on, or start again with a longer cord. If you splice, tails can be tucked into the inner wraps. Either way, make a note of how much longer your cord needs to be. Finish the wrapping by tucking the end of the cord under one of the first wraps, again a crochet hook helps with this.
Add the berries
So far, this project is fairly easy, but this next bit is genuinely hard. Be prepared to unpick several times, and just be patient with it. Thread you embroidery needle. Instead of knotting the thread, clip the bulldog clip about 4 to 5 cm from the end. A knot would just pull through the crochet, but the clip will hold the thread in place while you get the stitching started.
The wreath doesn't have a front/back at this point, so berries will be added to both sides, but for clarity I'll call the side the bulldog clip will be on the back. Pull the needle from the back of the wreath to the front through the cord. You will probably feel if the stitch is on the inside or outside of the ring. It doesn't matter either way, but I feel the whole thing is more secure if the following stitch is on the other side of the ring.
Do the thread wraps for the French knot; place the needle for the stitch so that it will come out the other side of the wreath a bit further along from the starting point, but don't press it through. Gently tighten the knot around the needle, snugly against the wreath, then hold the knot in place between the fingers of one hand while pulling the needle through with the other. It is very easy to pull too tightly and end up with the knot in the middle of the cord, or as a big mess on the other side of the wreath. Just unpick any mistakes and try the knot again.
Once you've made the first knot, take a look and decide if you want to use more/fewer strands, or maybe more/fewer wraps in your French knots. Also, consider if you want to try something else. A friend at the embroiderers guild thought I was daft, if not mad, to use French knots instead of beads. She did understand when I explained that my beads were to shiny to go with the soft colour of the yarn, but I had to agree that beads would be much easier. If you get no joy from stitching French knots, my advice is to just not do them. Instead, brainstorm for a few minutes, thinking of any crazy (or sensible) way to decorate your wreath, then assess each idea, and you'll probably come up with something cute and fun.
Assuming you are happy with the stitch, turn the wreath over and do the same knot on that side, again sticking the needle through to move around the wreath. When you complete the circuit, place the last stitch so the thread comes up at the original entry point (oh, and you can remove that bulldog clip, if you haven't already after having it snarl your thread several times). This bit is probably not strictly necessary, but I like knowing what my ends are doing, so thread the ends of the thread into the needle alongside the, um, other ends that are already there. Make a final knot, then trim all the ends off where they are pulled through the other side.
The bow
Thread your sewing needle but leave it unknotted. Cut 10 cm of ribbon, angling the ends in the same direction. Fold the ribbon in the center at an angle, so the two arms go up at the angle the loops of the bow will have.
Fold each arm back down forming the loops and ends.
Stitch the ribbon through the original fold and crossed arms. Gather the thread and tie it.
Then wrap the thread around the gathers to form the knot of the bow.
Tie the thread but don't trim it. Place the bow on the wreath and use the same thread to tack it on, sewing around the ring twice, then tie it again and tuck and trim the thread.
There you go! I hope you find this tutorial helpful/inspiring/amusing. If you do have a go at making one of these wreath ornaments, I'd really like to know how it turns out.